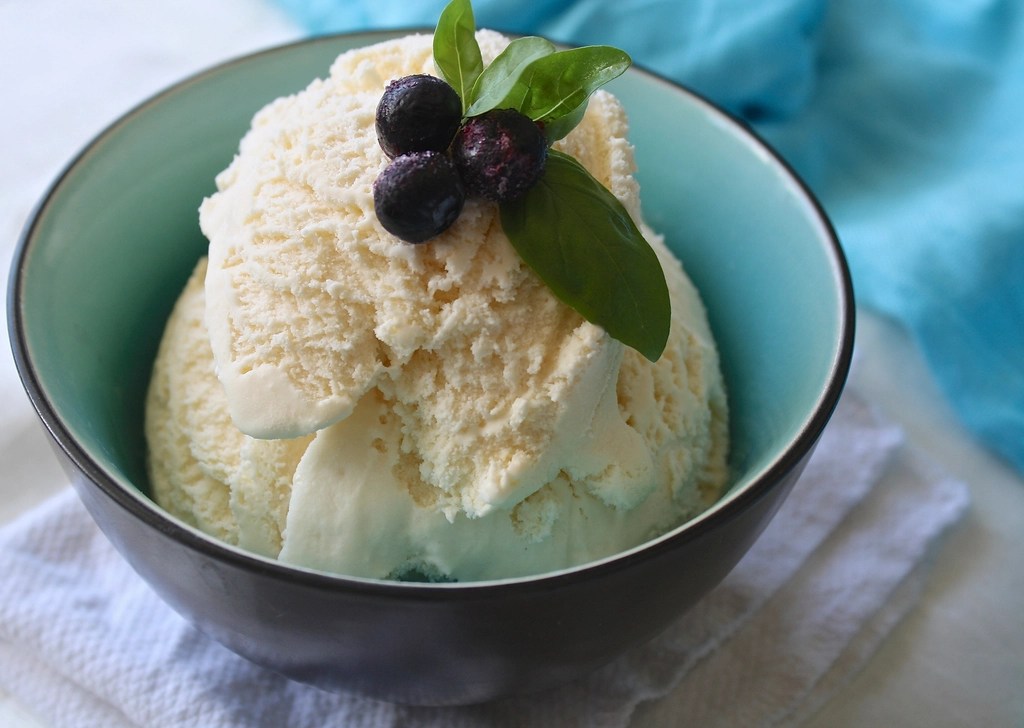
Ice Cream Made with Raw Milk
If you’re like me, then when the summer heat rolls in there is one thing that is needed to quench it: ice cream. Ice cream is an all around fan favorite year round, and homemade ice cream certainly tops the charts when it comes to desserts.
As always, the most important element involved in creating delicious food is the ingredients used. This recipe utilizes raw milk, which offers the added benefits of improved digestion and nutrient bioavailability. I love being able to get raw milk from a local farmer and using it to make something delicious. If you’re curious where you can find raw milk in your area I offer some suggestions here.
This simple homemade vanilla ice cream recipe is a wonderful starting point from which you can create a variety of flavors. Making ice cream is a fantastic activity to do this summer, or anytime that you need to satisfy that craving!
Read on for the benefits of making homemade ice cream, information about ice cream makers and finding raw milk, and finally, the recipe.
Why should I make Homemade Ice Cream?
Taste
If you’ve ever tried homemade ice cream then you know that it’s phenomenal. Store bought is good, but the flavor of homemade ice cream is in a league of its own. While plain vanilla is delicious, by making ice cream at home you have the added advantage of being able to customize the flavor to fit whatever you are craving or have available to use. Plus, home made ice cream is much thicker and creamier than it’s store bought counterpart. Once you taste it, you’ll know it’s worth it.
Quality
Finding ice cream in a store that is made with ingredients I feel good about eating is hard. I don’t believe that ice cream needs to be a junk food we indulge in and then feel guilty about, but the ones available at the supermarket are full of ingredients that initiate this cycle. When you make ice cream at home, you enable yourself to consume a treat that is actually good for you and your family, which means a more sustainable relationship with food.
Price
The few ice cream brands that have ingredients I would feel good about eating are typically way pricier than the average carton of ice cream, and they’re almost always in much smaller containers. Making homemade ice cream is a very cost effective alternative, as you likely already have the ingredients for it in your kitchen. An ice cream machine will cost money up front, but if you use it regularly you will get your money’s worth in no time.
Things to Know
Do I have to use raw milk?
If you do not have raw milk available to you, you can substitute with store bought cream and milk. I love to use raw milk for the added nutritional and digestive benefits it offers, but if I did not have it available to me I would use whatever I could find, preferably something that is organic, minimally processed, and did not have added vitamins. Some milk brands I’d recommend are Straus Creamery and Alexandre Family Farms.
How can I find raw milk?
You might be able to find raw milk by looking on Facebook marketplace, asking people at your local health food store, checking your local farmer’s market, asking on nextdoor, contacting your local Westin A Price chapter, or by searching on databases like Real Milk or Get Raw Milk. Wherever you get it, be sure to do your homework and see that their cows are well taken care of and they are taking the necessary precautions to produce quality dairy.
Do I need an ice cream maker to make ice cream?
While you do not have to use an ice cream maker to make homemade ice cream, I recommend it. Freezing your ice cream batter in a dish will not create the same creamy, smooth dessert that an ice cream maker does.
What kind of ice cream maker do I need for this recipe?
You can use whatever ice cream machine you have available to you. I use the kitchen aid ice cream maker which attaches to my mixer and is very easy to use as it doesn’t require extra items like rock salt.
Recipe
Ingredients & Tools:
- 1/2 cup Cane Sugar – I have experimented with using maple syrup instead of sugar, but I find that the water content in the syrup creates small ice crystals in the ice cream, so I prefer sugar.
- 4 Egg Yolks – I am comfortable consuming raw egg yolks in my ice cream so I occasionally skip the heating process. If you are not, be sure to heat your ice cream batter each time, as described below, to “cook” the eggs.
- 3 cups Raw Cream – If my milk pickup for the week doesn’t have a full 3 cups of cream, I will use milk for the remaining amount needed, so long as there is at least 2 cups of cream.
- 2 tsp. Vanilla Extract – I use my homemade vanilla extract which you can learn to make here.
- 1/4 tsp. Salt
- Optional: 1/4 to 1/2 cup of add-ins such as chocolate chips, chopped fruit or nuts, peanut butter, etc.
- Medium Bowl
- Whisk
- Sauce Pan
- Ice Cream Maker and any necessary materials for its function
- Container for Storage- I like to repurpose a plastic yogurt container for this, but you could use a glass storage dish or anything you have on hand.
Directions
- Combine the egg yolks and sugar in a medium bowl, whisking until they become fluffy and turn a lighter yellow color, about 5 minutes1.
- Heat 1.5 cups of cream in a sauce pan over medium heat until small bubbles form around the edges and it is just beginning to steam. Watch closely and remove from heat promptly.
- Slowly pour the heated cream into the egg-sugar mixture, whisking as you do, until well combined. Return this mixture to the pot and heat again, stirring constantly, until small bubbles form around the edges and it begins to steam. Do not bring to a boil.
- Remove the pot from the heat and stir in the rest of the cream, the vanilla, and the salt. Place the batter in the fridge and allow to cool completely before pouring in your ice cream maker.
- Turn on your ice cream maker according to the manufacturer’s instructions. Slowly pour in the cooled batter and leave it to mix for the required amount of time, generally 15-20 minutes. If adding any mix-ins, add them during the last 2-3 minutes of mixing2.
- Scoop the ice cream out of the machine and into your storage container. Place in the freezer so that the ice cream can cure for 2-3 hours before consuming.
- Enjoy!
Notes:
- After step 1, if you are comfortable consuming raw egg you can simply mix in the remaining ingredients and proceed to step 5. If you are uncomfortable consuming raw eggs, follow steps 2-4 to “cook” them. ↩︎
- I find that with larger more solid additions, such as chocolate chips, it works best to mix them in by hand after the ice cream finishes mixing in the machine. ↩︎
Have you ever made homemade ice cream? What is your favorite flavor? Let me know in the comments below!
Subscribe for More Recipes Straight to Your Inbox!
Some links in this post are affiliate links and as an Amazon Associate I earn from qualifying purchases, at no extra cost to you.
Recipe Card
Raw Milk Ice Cream
Ingredients & Tools
- 1/2 cup Cane Sugar
- 4 Egg Yolks
- 3 cups Raw Cream
- 2 tsp. Vanilla Extract
- 1/4 tsp. Salt
- Optional: 1/4 to 1/2 cup of add-ins such as chocolate chips, chopped fruit or nuts, peanut butter, etc.
- Medium Bowl
- Whisk
- Sauce Pan
- Ice Cream Maker and any necessary materials for its function
- Container for Storage
Directions
- Combine the egg yolks and sugar in a medium bowl, whisking until they become fluffy and turn a lighter yellow color, about 5 minutes.
- Heat 1.5 cups of cream in a sauce pan over medium heat until small bubbles form around the edges and it is just beginning to steam. Watch closely and remove from heat promptly.
- Slowly pour the heated cream into the egg-sugar mixture, whisking as you do, until well combined. Return this mixture to the pot and heat again, stirring constantly, until small bubbles form around the edges and it begins to steam again. Do not allow it to boil.
- Remove the pot from the heat and stir in the rest of the cream, the vanilla, and the salt. Place the batter in the fridge and allow to cool completely before pouring in your ice cream maker.
- Turn on your ice cream maker according to the manufacturer’s instructions. Slowly pour in the cooled batter and leave it to mix for the required amount of time, generally 15-20 minutes. If adding any mix-ins, add them during the last 2-3 minutes of mixing.
- Scoop the ice cream out of the machine and into your storage container. Place in the freezer so that the ice cream can cure for 2-3 hours before consuming.
- Enjoy!
- Notes:
- After step 1, if you are comfortable consuming raw egg you can simply mix in the remaining ingredients and proceed to step 5. If you are uncomfortable consuming raw eggs, follow steps 2-4 to “cook” them.
- I find that with larger more solid additions, such as chocolate chips, it works best to mix them in by hand after the ice cream finishes mixing in the machine.

Share your thoughts